Showing posts with label DIY. Show all posts

Saturday, 29 August 2020

3D-printing Feudal Guard... pt. VII

After the last update, I picked up the Feudal Guard Troop Transport (counts as Chimera)... The kit comes with just about all the options you could possibly want for a Chimera and is just as detailed as I have come to expect from TMC designs.

While the design of this kit is absolutely amazing (I think it's miles better than the GW kit I owned more than a decade ago, which is still being sold today, only at twice the price), I still felt the need to add a little personal twist.

For the Chimera I wanted a wheeled chassis. The wheels were found on Thingiverse and were scaled to fit the hull of the Troop Transport. I also added a new hubcap, more in line with the rest of the design... 

Big ass wheels instead of tracks...

The last thing I changed, was placing a vent over the holes meant for the lasgun array. Can't help it, but I just don't like the way these look. I disliked them on the original model and, even though it looks better, I dislike them on this version. However, thanks to the wonders of 3D-design, it was remarkably easy to convert the model slightly and cover up these holes while still keeping the design intact...

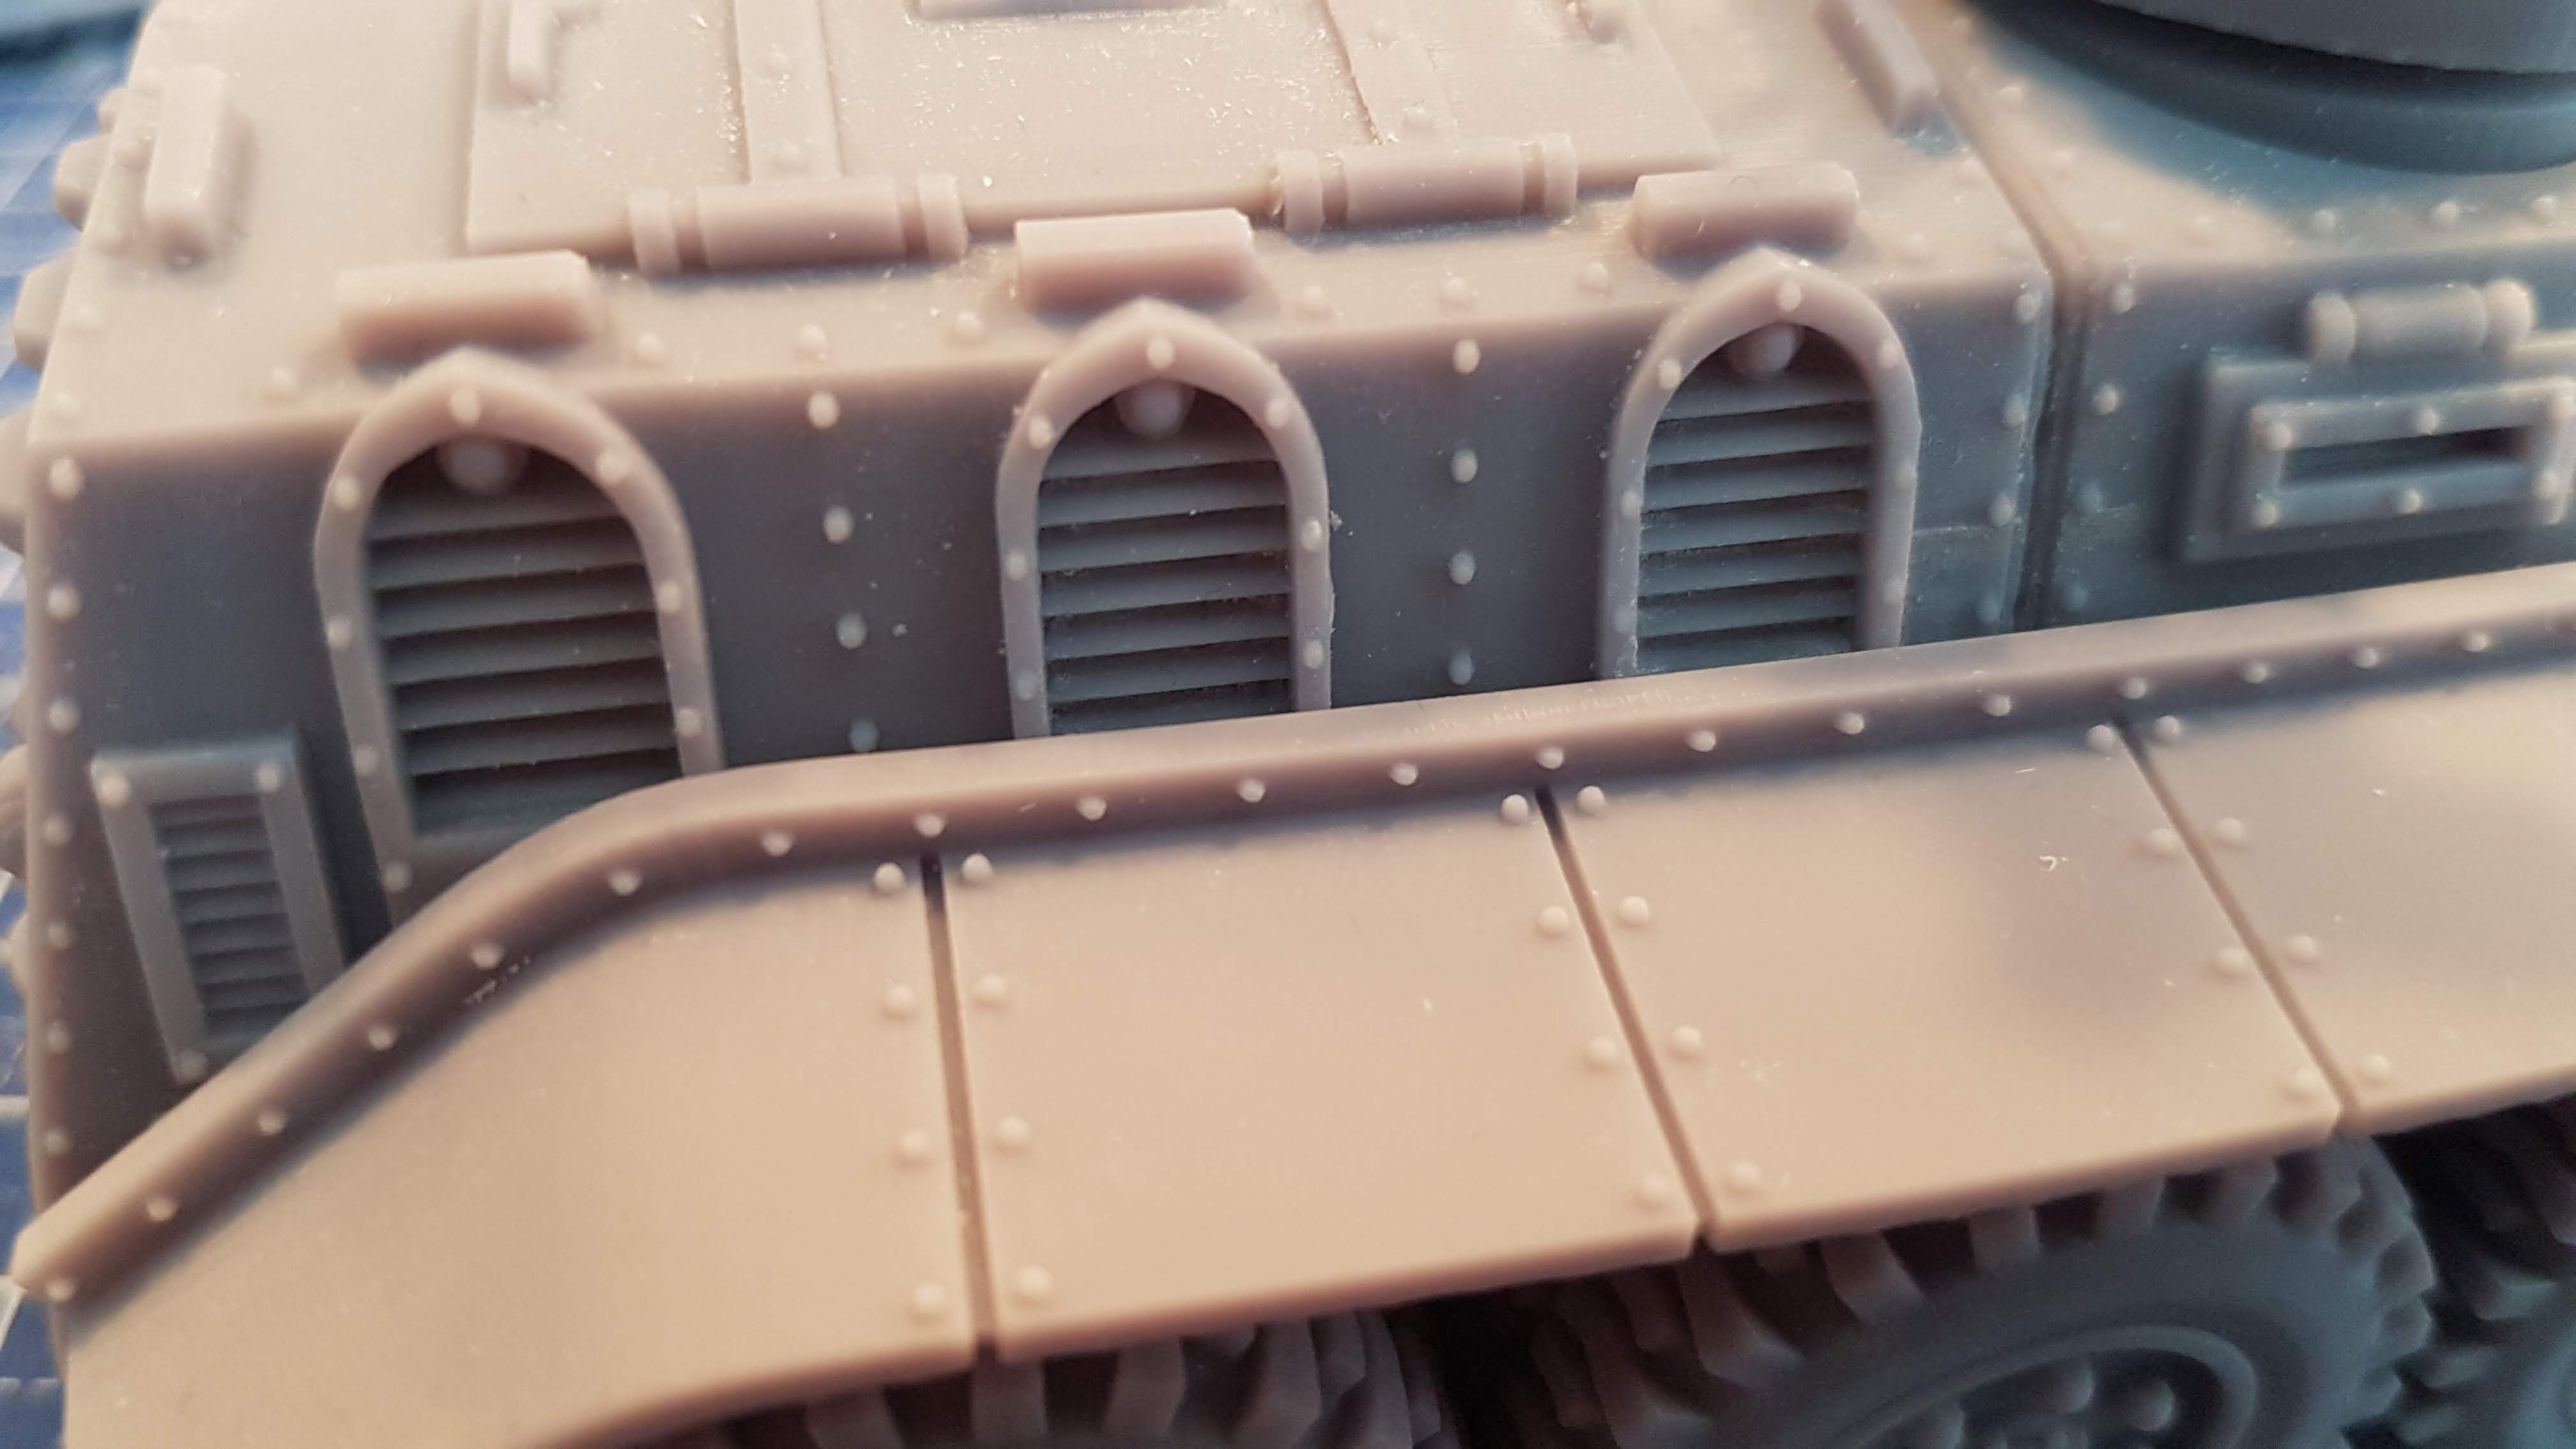
Vents instead of the standard lasgun array...

The finished model is just sooooo gorgeous...

Armed with all the bolters I could fit on...

I also wanted to print a Hellhound flamethrower tank. On the Discord channel of TMC there were a couple of very nice designs made by other users, but they didn't have the look I wanted. Working from the original hull design, I used Tinkercad to create a suitable extra fuel tank for my version of the Hellhound.

The detail on the back of the fuel tank...

I replicated the rivets from the original model as closely as I could and tried to mimic the style of the rest of the model. I ended up with a big, well armoured fuel tank, not bad for a novice designer like me...

The printed version came out very good.

The finished Hellhound... 

The prints came out near flawless; only one of the track guards is slightly bent (just like the Battle Tank did), but that's hardly visible... 

Both models weigh around 200 grammes (the Chimera weighs about 190 and the Hellhound just about 240 grammes) and took four separate prints each. I printed these at a resolution of 0.03mm. While this adds several hours to the printing time, the detail of the prints is very, very good... 


Armoured support...

These vehicles represent a sizable investment in time and resin, but I am extremely happy with the results. My Elegoo MARS continues to impress me...

I will be printing more Chimera's, but first up is an Elite Feudal Guard squad with grav chutes and some Cavalry...


Thursday, 20 August 2020

Designing and 3D-printing soda can terrain...

Because I haven't played any sort of 40K for well over a decade I have no scenery or terrain for this game... 

Some time ago (before I had my Mars) I printed this soda can terrain piece on my school's Ultimaker 2+. While not very detailed (this kit was designed with FDM-printing in mind), the print upgraded a humble soda can to a piece of attractive and functional terrain. Because I had no 40K at the time, I donated this piece to a gaming buddy, who painted it and now uses it on his battlefield. 

While browsing Thingiverse for terrain pieces to print I came across this very same upgrade kit again and thought of how it could be improved to make use of the capabilities of my Elegoo Mars.

I took more inspiration from another design made by the same user (be sure to check him out as he has several cool upgrade kits). I ended up not using any of his components, but he inspired me all the same!

While I know my way around Tinkercad I lack the ability to draw intricate/organic designs, that's why I used two pieces from this set. Using the gothic grate and the round fan I gradually worked towards creating a set of upgrade pieces. 

I have three kinds of cans available, the standard soda/beer can (be it 0,33 or 0,5L) and two kinds of cans commonly used for energy drinks. Funny thing is, we don't drink soda, beer or energy drinks, so I ended up buying a couple of the cheapest cans I could find and poured the contents down the drain... 

All these cans have different diameters and heights, but I wanted to create kits for them all. All kits are different, but share the same components to create an overall theme (I am a sucker for uniformity). To prevent ending up with a dozen identical terrain pieces, I made the upgrade kit modular, featuring several different versions of key components and several optional components. 

An example of the parts used to upgrade a can... 

At the moment I have sets for the two largest diameters, and I am thinking about ways to do something different with the smallest cans.

I have completed three different cans so far... 

Two of the different front caps...

Two of the different end caps...


Two examples of how to add variety by using different parts to detail the can... 


I have uploaded this modular upgrade kit to Thingiverse, check it out if you are interested!


Friday, 3 April 2020

3D-printing tanks... Pt. IX: T18 Boarhound

I love printing unusual and less-used vehicles, and while Thingiverse is a true treasure-trove not everything I am looking for is available there...

One of the vehicles I have been looking for, is the T18 Boarhound armoured car...

I really love the design of this vehicle... 
I wanted to add this armoured car to my platoon of Staghounds or have it serve as a command vehicle in a British armoured car company... It's initial version was armed in the same way as the Staghound Mk. I and is't a nice miniature to add some variety.

As with the Staghound, this is a very large armoured car...
With a Sherman and a Staghound for scale...
Not only is it almost as big as a Sherman, it weighs just about the same too... This is one impressive armoured car!

I found the Boarhound on Shapeways and contacted the designer (Kampfflieger) to ask him if the stl-file was available for download. He quickly responded and directed me to his Patreon: Panzer Printer... Apart from the Boarhound there are a lot more cool designs, mostly of rare vehicles. The designs themselves are pretty good and there's a wide selection of models to choose from.


I had to re-scale the design from 1:72 to 1:100 and I have adapted the model to accommodate a set of small magnets. As an added bonus, the design itself is already hollow and open at the bottom; resulting in a rather economically effective print, despite it's size...

However, that proved to be something of a hindrance, too... The walls of the hull are so thin, the vehicle started warping, even after I had cured it. I think it's because the design was originally intended to be printed by Shapeways, and they use a different technique...

It might be hard to see, but the thin sides are flaring outwards...
Above you can see the first two printed hulls. At first I thought the warping was caused by the supports I left inside the hull (I didn't bother removing them as you wouldn't be able to see them anyway), but the second print suffered from the same problem, despite having all of the internal supports removed. I took extra care while cleaning the model, but it started warping even before I got the chance to fully cure it...

Screenshot made while in Tinkercad...
To counter the warping I thickened the walls of the rear half on the hull and I inserted blocks to connect the axles and strengthen the overall construction.

The model on the right features the strengthened frame...

Here you can see the adaptation I made to accommodate a small magnet.
I also added a few pieces of stowage...
The stowage is from Thingiverse. The pieces are designed by TigerAce1945 and can be found HERE... Seeing how easy it was to add some detail to the (already awesome) model, I regret not trying it any sooner...

While cutting up the file and re-scaling the model I forgot I had already re-scaled the turret... Hence, the first turret came out much too small, being scaled down twice instead of just once... For the second print I replaced the file and printed it in the right scale...

The difference in size is obvious...
The warping and the re-scaling error are all part of the learning experience... In the end the Boarhound turned out great and I will be printing a couple more!
I really, really, really like this model; it's a clean design and nicely detailed. You can expect to find many more of Panzer Printer's designs here in the future!

Monday, 9 March 2020

3D-printing game markers for What a Tanker!

As a bit of a test I designed a set of markers, or tokens, for What a Tanker!

This game, made by Too Fat Lardies, is fast becoming one of my favourite games. What a Tanker! uses a set of acryllic tokens which are pretty solid to begin with, but I really wanted to try to design and print my own set...

After a bit of tinkering in Tinkercad, a free, web-based 3D-drawing program, I came up with this...


Four individual markers... From left to right: reloaded, buttoned up, aimed and target aquired... I designed these to be printed small; the biggest is about 20mm tall... I also uploaded these on Thingiverse so that other Tankers can print them too.

Fresh out of the printer... The prints are extremely delicate...
I managed to get them cleaned up rather easily, but due to the delicate parts it did take me a bit longer than usual...

I love the detail on these, they came out better than I expected...

The first set of printed markers with the standard markers...
Obviously, these will get painted.

To complete my set I am going to print another set of these, for a total of six of each marker, enough for most games.


Monday, 2 December 2019

Out of depth...

As the Hex Terrain Toolkit is used rather intensively, there is bound to be some wear on the parts... The first piece to show this is the depth cutter. More precisely, the bit that's used to cut the Hexes in half... These half thickness Hexes are used for rivers, risers and snowflakes, this means it gets used a lot...

It might have something to do with the fact I use a table cutter instead of a hand held model. This means the hot wire is in contact with the same spot of plywood kit for longer periods of time, the high temperature of the wire burning into the wood and glue. Or maybe it's just the increased power of the table cutter when compared to a hand held model...

Either way, the module is damaged to such an extent that the precision the whole system relies on, is lost...

The wear on the Toolkit... 
I came up with a solution to this problem...

A piece of MDF board with two pieces of wood, glued on top as guides. The wooden guides are 9mm tall (at least, they were supposed to be). So I glued a sheet of 1.5mm plasticard in between them. As this proved to be insufficient (as the wooden guides were closer to 9.5mm) I added a layer of 0.5mm plasticard. Now this little contraption gives me the 7.5mm of depth I need.


This picture shows the two layers of plasticard...
I could have asked for a replacement, and in time I probably will, as the regular depth cutter is beginning to show signs of wear, too... But for now, this solution works as planned and results haven't suffered.